Posting Blogs and Photos
Chuck and Anne have recently recently asked questions about the blog which I thought I would answer on the blog in case the information was useful to others.
Formatting
A while ago, I introduced a WYSIWYG feature in the space in which blogs are created. You can see it at the top of the screen where text is entered. This designed to allow you add formatting and see what it will look like in real time. Chuck has been creating blogs in Word and then cutting and pasting into the blog. This has caused problems where the formatting used by Word differs from the formatting used by the blog. Note that this does not occur if you simply enter the text directly in the blog. When I have seen this happen, I have gone into Chuck's posts, opened them, turned off the rich text editor (i.e., the WYSiWYG) and then edited out the microsoft formatting.
My suggestion to Chuck was to save his Word documents as plain text (ending with a .txt) rather than as Word files (ending with .doc) in the hopes this would avoid the conflict. I don't know if Chuck has tried this, but his problems have continued. Another way of doing this would be to use a plain text editor like Microsoft notepad (or whatever the equivalent is in Apple). The other possibility would be to turn off the rich text editor before you past in the Word text. You can do this at the botton of the entry screen. Just click on "switch to plain text editor." I haven't tried this so I don't know if will solve the problem.
Photos
At about the same time I introduced the WYSIWYG formatting, I had to change the module that allowed photos to be inlcuded in the text of blogs. The old module was not being supported and stopped working correctly. The new module is less user friendly and is causing confusion. When I have a chance, my plan is to update the entire webd site to the next version of Drupal which will open up new possibilities.
But for now, photos are included in blogs by a botton at the top of the entry screen. The button looks a little like a yellow photo of a mountain. If you hover over it, you will see that it says "insert/edit image." when you click on the button, you get an image properties dialogue box. The secret to adding a photo is the URL entry. With respect to photos that have been posted to the web site as images in the image galleries, the easiest way to do this is to click on the "browse server" botton. This will now give you an alphabetical list of all of the photos in the photo galleries. You can scoll down until you find the photo you want and then click on "add" at the right side of the screen. [BTW, this exercise also shows how helpful it will be if you name the photos that posted to the image gallery with a name that describes the photo.] This will bring you back to a prevew screen than shows you how the photo will look in your blog (note that the text used in the preview screen is jibberish that is just there for formatting purposes - it doesn't mean that your blog will now have that text). You may have to wait a minute for the photo to appear in the editing screen.
For pupose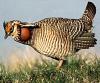 s of this explanation, I added a photo to this blog entry. I chose the Lesser Prairie Chicken photo that Anne was trying to add to her blog. I had to chose between the full size image and the thumbnail, so I choose the thumbnail. After the image appears in the preview screen, you can use the left sde of the preview screen to resize the photo, or to align it (I chose "left" alignment), to add borders (I did not), and to add free space around the photo (I entered "1)") for both the horizontal and vertical entries). Then say OK and the photo should appear in the text. If it does not appear on the line you hoped it would appear, I found that you can drag the photo up and down. To edit it further, right click on the photo (you have to be in edit mode in the blog) and the click on image properties. That will bring you back to the preview screen in the dialogue box where started.
If any of you have more questions, please feel free to call or email me and i will try to explain this in more detail.
- Mark's blog
- Login to post comments
Excellent Feature
and information, Mark. Thank you!